FreshnCrunchy

Delicious, Fun & Healthy Food

plant-based

Summer Mango Salad

SaladLina LiwagComment

It's definitely the height of Summer here in Toronto.  It's so hot and humid!  Some people complain but I definitely love this kind of weather.  Tropical is the word.  It reminds me of beach days in the Philippines.  I'm going to enjoy it as much as I can 'cuz I know that down the road snow will becoming.  

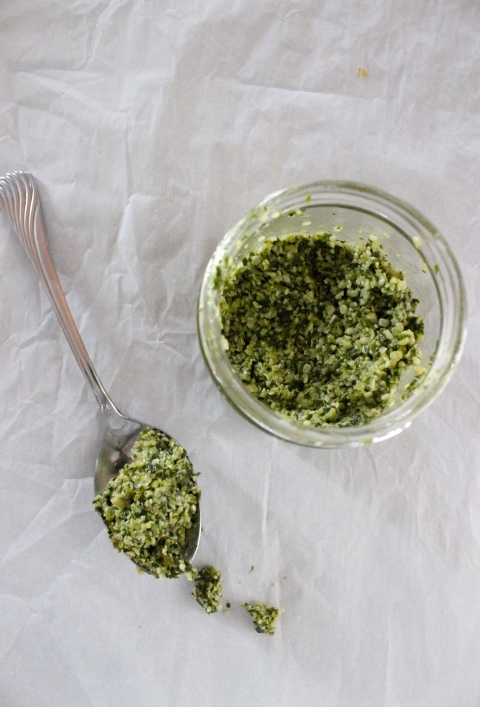
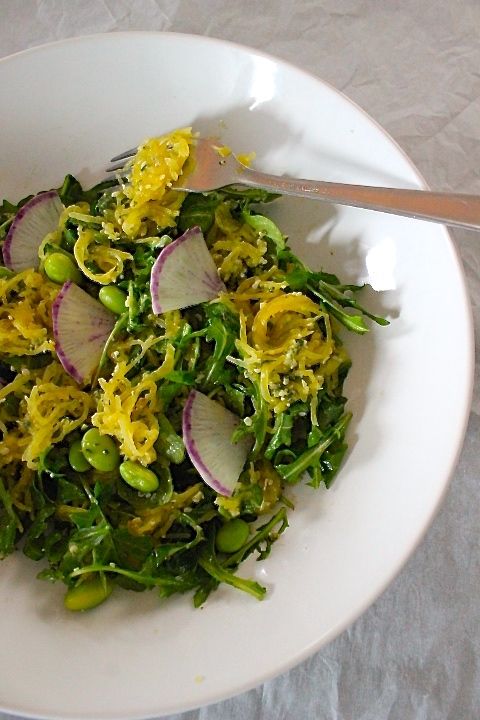
This is the also the season for lighter meals.  Lots of water, green juices, smoothies, fruits and veggies are what our bodies naturally crave at this time.  Hydration is the key.  We've been cranking our old but reliable Blendtec these days and chopping fruits and veggies for salads and snacks.  

Mangoes have been showing up at the markets in their best form lately - the ripe and juicy kind with the smoothest flesh - best enjoyed by self-proclaimed mango connoisseurs like me.  I grew up in a mango growing region in the Philippines and I've eaten tons, that's my only qualification I must say.  I love a great tasting mango!

So it's not so surprising that we've been using them in our favourite recipes while they're here: smoothies, popsicles and of course, salads.  Yesterday, my friends Sam and Rowena came over to learn how to make more plant-based meals and this is one of the salad recipes that I shared with them.  Light and refreshing is how I would describe Summer Mango Salad.  It's also nut-free and soy-free.

Summer Mango Salad

Ingredients:

2 large ripe but firm mangoes, cut into matchsticks size
2 cups purple cabbage, cut into julienne size strips
1 large or 2 small carrots, julienned
1/2 of a cucumber, julienned  
1 small sweet pepper, julienned
8-10 mint leaves, sliced thinly
3 Tbsp. minced red onions
1/3 c. pumpkin seeds, toasted

Wash and prep all ingredients.  I used a mandolin to cut the mangoes, carrots and cucumber in uniform thickness then I sliced them into julienne sizes.   I also used it to shred the purple cabbage in the same thickness.  It's such a helpful tool.  Toast the pumpkin seeds in a pan on medium heat for about 3 to 4 mins. and to watch carefully making sure they do not burn. 

Dressing:

1/3 c. avocado or walnut  oil
3 1/2 Tbsp. lime juice
2 tsp. stone ground mustard (I used this)
2 tsp. maple syrup
salt and pepper to taste

Place everything in a NutriBullet or a blender and whizz briefly until the dressing turns smooth.  Adjust the taste if necessary,  

Assembly:
In a large bowl, mix the carrots, purple cabbage, sweet peppers and red onions.  Add some dressing.  Let it sit for 15-20 mins. for them to soften.   Before plating and serving, add the mangoes, cucumber and some of the mint with more dressing.  Top with pumpkin seeds and the rest of the mint.  Enjoy!

Variation:
You can also add greens and slices of avocado if you want this to be more substantial.  

Hope you're having a fabulous Summer. You'll see more mangoes in the next few posts, I promise. I'm trying my best to take 'blog worthy' photos in between my busy schedule at my 9-5 job and my family.  I'm looking forward to sharing them soon.    Cheers!

Xoxo,

Lina


Strawberry & Chocolate Ice Cream Cups (Raw)

Raw Dessert, DessertLina LiwagComment

Strawberries and chocolates.  This combo is seriously delicious!  It's not just my favourite but the whole family's especially my son.  This dessert is made specifically for him.  I usually get a list of what he wants to eat during the week.  Now that he has a summer job, it includes his packed lunches and snacks but this is for that special treat usually enjoyed after those few days where he has to take a 2 hour bus ride home.  

Desserts doesn't have to be complicated.  They should have wholesome ingredients, quick to make and the serving just enough to satisfy that sweet craving.  This recipe is all that.  Here are the tools necessary in making this recipe:
- A high speed blender (this is a must to get that smooth consistency of the ice cream cups).
-  Silicone mini-moulds (I used these) or mini muffin liners
- Muffin tray like one of these
- Small sauce pan to melt the coconut oil and/or cacao butter.


Strawberry & Chocolate Ice Cream Cups
Ingredients:

Strawberry Layer
1/2 lb. organic strawberries, approximately 1/2 pack
+ a few more for toppings (thinly sliced)
2 c. raw cashews, soaked overnight and rinsed
1/4 c. fresh orange juice
2 Tbsp. lemon juice
1/4 c. maple syrup or raw honey
1/2 c. melted coconut oil
1/2 teaspoon vanilla essence or powder
2 Tbsp. frozen blueberries (optional and for colour balance only)

Place all ingredients in a high speed blender with the berries and all the liquid ingredients being on the bottom and the cashews on top for easier blending.  Whizz until smooth.  Adjust the taste. Line the muffin tray with the silicone moulds or muffin liners then pour the mixture into each cavity, leaving approximately 1/8" for the chocolate topping (see photo above).  Lightly bang the tray a few times into the counter so the mixture settle.  Freeze for 3 - 3/12 hours.

Chocolate Topping
1/2 c. chopped cacao butter or coconut oil
1/2 c. raw cacao powder
1/4 c. maple syrup
1/2 tsp. vanilla

A few drops of orange oil (optional)
pinch of good salt

In a small sauce pan, boil water then lower the heat.  Place all the ingredients in a small bowl and then place the bowl on top of the pan and stir until the mixture is well incorporated.  Take  out the frozen berry cups then spoon 2 - 2/12 Tbsp. of the chocolate sauce on top.  Let it set for 2-3 minutes then top with thinly sliced strawberries and other things that you may fancy like flowers or chopped nuts.   Peel off the liners, let it thaw for 8-10 mins. and serve.  Enjoy!
 

So it's Father's Day tomorrow.  I hope you will make this day a special one for the special dad in your family.  My hubby doesn't want any gifts so I decided to make him my version of homemade chocolates.  They usually give him that big smile.

For this month of June, I'm learning about the heart, my own heart specifically.  It's the perfect time to understand God's wisdom about it and see where I can change.  And as always, every time you embark on learning something, you sure get tested.  Change is not always easy but everything will all work out in the end. 

"Guard your heart above all else, for it determines the course of your life."
Proverbs 4:23, NLT

Roasted Spaghetti Squash With Arugula and Hemp Pesto

Dinner, LunchLina LiwagComment

It's the middle of winter here in Toronto.  I'm making a lot of cooked and nourishing meals to keep us warm. This weekend, my boy was home relaxing from all his busy days at the University. I thought of making something new: spaghetti squash.  He loves good food and he's my biggest critic.  I'm so happy to say that he enjoyed this recipe!

Spaghetti squash is nutritious.  It's packed with Vitamins A, B and C.  It also has beta carotene, lutein and zeaxanthin, antioxidants that promote good eye health.  Consider this as a better option than the regular pasta.

Roasted Spaghetti Squash With  Arugula and Hemp Pesto
Ingredients (preferably organic)

1 medium size spaghetti squash
1 Tbsp. avocado oil
Pinch of salt and pepper

Preheat the oven to 400 degrees.  Cut the squash into half and remove the seeds.  Drizzle the oil, and season with salt and pepper.  Transfer into a roasting pan lined with parchment paper and roast, cut side down until soft, approximately 45-50 mins. depending on the size of the squash.  While roasting, prep the arugula salad and pesto.  When the squash is cooked, use a fork to scrape the flesh into long strands.   Transfer into a bowl and add some of the pesto and toss to combine.   Martha Stewart has a neat video on cooking spaghetti squash by stove top method.   Take a look here.

Arugula Salad
2-3 handful of arugula leaves
1 small purple daikon or watermelon radish, cut thinly (I used a mandolin)
1  cup frozen edamame, soaked in boiling water for 3 mins. then drained
3 Tbsp. olive oil
3 Tbsp. apple cider vinegar
3/4  tsp. stone ground mustard
1 tsp. maple syrup
Salt and pepper to taste.

Prep the salad components and mix the dressing in a small jar.  Dress the greens just before serving.

Hemp Pesto
1 1/2 c. packed basil leaves
1/2 c. hemp hearts
2 Tbsp. pine nuts (or more hemp)
1/4 c. lemon juice
3 Tbsp. olive oil
2 cloves garlic (depending on taste)
Salt and pepper to taste

Place everything in a food processor.  Pulse several times, scraping the sides.  Taste and adjust accordingly.  I was conservative in adding extra oil but feel free to add more to suit your taste.

Assembly:

In a salad bowl, combine the arugula leaves with half of the purple daikon and half of the edamame.   Add some of the dressing and toss. Adjust the taste.   To serve, use the arugula as a bed for the squash and top with the rest of the edamame and purple daikon or even more pesto.   Enjoy!

IMG_8694.jpg

If you live in a cold place like I do,  I hope you're keeping warm.   This meal is also great with a good bowl of hot soup which I've also been making.  I love this older recipe here. I can't wait to catch some sunshine somewhere warm soon!

Xoxo,

Lina 

Fall Abundance Bowl

Dinner, Lunch, SaladLina Liwag1 Comment


Fall.  Such a beautiful season!   The air is cool. The trees are bursting with colours.  Even the fashion has more character. At this time, we also see a lot of colourful vegetables: squash, beets, radishes, heirloom carrots and kohlrabi in various shades and varieties.

Two weeks ago, my husband and I visited Montreal.  Our friend Chloe took us around this charming city.  We explored the place mostly by foot.  We checked out markets, spice and tea stores, unique cafes and artisanal shops.  We ate awesome food and met new friends.  One of the places we visited was Marche Jean Talon, a huge market displaying all the wonderful produce of Quebec.  The sights, smell and energy of this place was intoxicating to a foodie.   I just had that urge to cook when I was there!

So here's a dish I made this weekend - inspired by the new season and our recent trip to Montreal.  I call it 'Fall Abundance Bowl.' This is a mix of raw and cooked salad, a bit more satisfying and grounding as our bodies also change with the season.  You can definitely design your own abundance bowl with whatever vegetables and other ingredients available in your own kitchen.  This is a huge dish which is also great for packed lunches.

Roasted Veggie: 
1  medium delicata squash, cut into 1/2" thick ( no need to peel if not too mature) 
4- 5  sprigs of thyme
1 1/2 Tbsp. coconut oil
salt and pepper to taste

Preheat the oven to 375F.  Place the cut squash in a roasting pan and mix it up with the other ingredients.  Roast for 25-30 minutes until slightly brown and tender. 

Salad: 
3 cups shredded purple cabbage
2 carrots, shredded or shaved using a veggie peeler
A few radishes, thinly sliced
2 handful of microgreens
4-6 Romaine leaves, chopped or any greens of choice
2 c. cooked quinoa or grain of choice
1 c. cooked white beans or chickpeas
1/4 c. dried cranberries
1/2 c. pumpkin seeds (lightly toasted for more flavour) 
4 scallions, thinly sliced diagonally

Dressing
1/3 c. tahini
1/3 c. water
2 Tbsp. olive oil
2 Tbsp. lemon juice
2 tbsp. apple  cider vinegar
1 1/2 Tbsp. maple syrup
1 Tbsp. tamari (optional) 
1 small garlic, chopped
1/2 tsp. grated ginger
salt  and pepper to taste 

Serve on bowls arranging the different components to show off their different colours. Drizzle the  dressing. 

Suggestions:  Use different vegetables and a different dressing.  I had these two older posts here and here

Here are the photos from Montreal.  


I hope you're enjoying Fall with its rich colours, wonderful food at the market and even just taking out your jacket, scarf and boots from storage.  

Xoxoxo,

Lina

Creamy Spiced Apple and Maqui Berry Kale Chips

Snacks, RawLina LiwagComment

This Summer, we've seen the best organic Ontario kale in great abundance.  I’ve been turning them into salads like this or juicing them with other Ontario produce as shown here.  Sometimes when we had cold weather, I added the greens into an Asian miso bowl like this one.  At other times,  I just quickly sauteed them with grated ginger and a bit of lemon juice. But as the season is quickly coming to and end... I’m wishing for an "Endless Summer" - kale chips came to mind.

Ahh.. kale chips!  Aren't they awesome to snack on?  But they cost so much...they range from $6.99 - $7.99 for a 2.5 oz. pack depending on what brand you're buying.  The owner of the reliable Brad's Kale Chips, Mr. Brad Gruno explains it here.  And now more and more people are making their own kale chips like me.  It's the best time to make them while kale is still abundant locally.

Personally, I like to be a little creative.  I'm inspired by my childhood memories, places I've visited, a current craving or maybe with just what's available in my kitchen. About five months ago when I attended Matthew Kenney Culinary, we created our own flavour of kale chips and then sampled the varied and interesting creations afterward (for those of you who maybe interested in taking either in-class or online courses at the culinary school, check them out at this link).

So this is the same flavour that I made on that Project except I used lacinato kale and acai berry powder at that time (check this photo). My hubby regularly buys organic freeze dried maqui berry for his daily smoothies and so I thought it would be a great sub for acai. Other freeze dried berry powder would work too.  If this is not available to you, not to worry as it’s optional.  It just gives the recipe an added dimension so to speak.  And  a bit of that wonderful purple colour.   And apple?  Yes, it works so well, it’s delicious!  My husband gave it a two thumbs up I might add.  As a note, please use organic kale and apple as they are high in pesticide residues and part of the on the Dirty Dozen+ List  as shown here.


Creamy Spiced Apple And Maqui Berry Kale Chips
Ingredients:

1 bunch curly green kale, washed, dried and torn into bite-size pieces
 cup raw cashews, soaked for 6 hours to overnight
1 green apple, cored and cubed 
3 Tbsp. lemon juice
2 Tbsp. apple cider vinegar
1 tsp. grated ginger
1/2 - 3/4  tsp. garam masala
1/4 tsp. Himalayan salt
pinch (or more) chipotle or cayenne pepper
1/2 tsp. Maqui berry or other freeze dried berry powder

Method:

1. Wash the kale then strip the green leaves off the tough center stems then tear leaves into large bite size pieces (note they will shrink in size as they dehydrate) and dry them in a salad spinner or with a clean tea towel.  Transfer them into a big mixing bowl where you plan to mix the sauce later.
2.  In a high speed blender, add the cashews with the rest of the other ingredients and blend until smooth.  Adjust the taste as you may want it more hot, spicy or more tart.
3.  Pour the sauce into the kale leaves and massage them with your hands making sure they are fully coated.
4. Lay the coated leaves flat on dehydrator screens and dehydrate at 115F until crisp, approximately 10-12 hours.  
Some dehydrate their kale on teflex sheets.  I like doing them just on the screens as I think the air flows freely this way.  If you don't have a dehydrator, check this link out for helpful tips in baking them.

Suggestions:

You can try other varieties of kale for this recipe like Lacinato, Red Russian or Redbor.  The creaminess of the end product depends on how big your bunch of kale is.  You will have to increase the cashew accordingly with how much leaves to coat.  Mine had 12 small leaves and the consistency was just perfect.    Remember, a recipe is just a guide so don't be afraid to be creative. Add your own spice or special ingredients. Experiment.  And don't forget to taste it. Enjoy!

As August winds down and we embrace a new month,  my tendency is to want to hold on longer to warmer weather, lots of sunshine and abundant local produce.  I also wish my favourite hydrangea flower can withstand all seasons.  However, I am yet again reminded of Ecclesiastes 3 that I read on my uncle's funeral in Arizona recently. "There is a time for everything, and a season for every activity under the heavens..."  

Happy Labour Day and welcome September!

Warmly,

Lina